If you already understand why tempering matters — that it locks cocoa butter into the Form V crystal structure that gives finished chocolate its snap, gloss, and clean mouthfeel — then the next question is almost always tactical: how should you do it at home? For non-industrial makers, two methods dominate: seeding and tabling. Both end at the same place — a melt held in the Form V working range — but they get there through very different physics, with very different demands on your kitchen, your patience, and your skill. (For the underlying crystallography and the basic temper curve, start with how to temper chocolate and the deeper cocoa butter chemistry and polymorphism primer.) This guide is a method-selection tool: read it, pick one, and spend your next three pounds of chocolate getting good at it.
What Each Method Is Actually Doing
Tempering is a crystal-seeding problem. Cocoa butter can solidify in six polymorphic forms; only Form V (β₂, melting point ~34°C / 93°F) produces the glossy, snappy, bloom-resistant result you want. Both seeding and tabling coax that crystal to dominate — but from opposite directions.
Seeding introduces Form V crystals directly, as solid tempered chocolate stirred into a cooled melt. The seed is the template. The melt simply needs to be cool enough not to destroy those seeds on contact, and warm enough to stay liquid while they propagate.
Tabling grows Form V crystals in situ, by aggressively agitating chocolate against a cool surface until enough stable seeds spontaneously nucleate. The marble is the heat sink and the agitator surface; your scraper does the rest. No external seed is added.
This is the central trade: seeding imports good crystals; tabling grows them. That difference drives everything else — batch size, skill floor, equipment, ambient-temperature sensitivity, and how often you’ll ruin a batch.
The Seeding Method: Temperatures, Ratios, and Workflow
The seeding workflow runs on three temperatures, all sourced from the Beckett tempering tables and cross-confirmed against Dandelion’s craft protocol:
Dandelion’s two-ingredient dark-chocolate variant uses a slightly cooler window — recombine to 87°F (30.6°C), working range 85.5–87°F (29.7–30.6°C), absolute ceiling 90°F (32.2°C) before you must re-seed. Some origin-specific bars prefer as low as 85°F (29.4°C).
Mycryo note. Professional kitchens sometimes substitute Mycryo — a commercial-grade, spray-dried, food-certified cocoa butter powder that is pre-crystallized to Form V — for seed chocolate. It’s dosed at about 1% by weight. Mycryo is a legitimate and precise tool, but it is not pantry cocoa butter; it is a specialty ingredient with a specialty price, and for most home makers, chopping up a known-tempered bar works just as well.
Seeding — Where It Wins
- Low equipment floor. A saucepan, a bowl, a spatula, and a reliable thermometer. No marble slab.
- Predictable. The seed defines the crystal structure; you’re not creating crystals, you’re extending them. Fewer variables means fewer failure modes.
- Scalable. Works from 200 g to 10 kg with only minor ratio tweaks.
- Forgiving of warm kitchens. Because you’re adding a large thermal mass of tempered solid, ambient air temperature matters less than with tabling.
Seeding — Where It Struggles
- Requires a seed source. Your seed chocolate must itself be well-tempered and from a chocolate compatible with your melt. Seeding a single-origin dark with cheap supermarket couverture introduces foreign fats and emulsifiers.
- Working window closes on over-seed. Too much seed or seed added too cold will over-crystallize — the melt thickens rapidly and becomes unworkable.
- Slightly slower to working temp. You’re melting the seed and warming the combined mass; total cycle time runs 15–25 minutes for a craft batch.
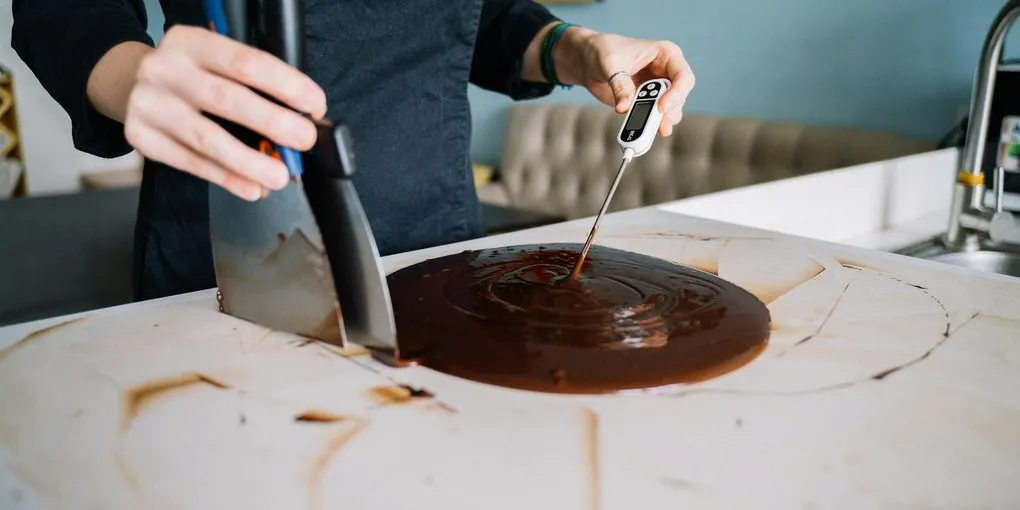
The Tabling Method: Temperatures, Motion, and Workflow
Tabling uses a cold marble slab as both a heat sink and a nucleation surface. The Beckett Science protocol, confirmed by Dandelion’s craft practice:
Dandelion’s craft parameters again map cleanly: melt to 120°F (48.9°C), table to ≤80°F (≤26.7°C), recombine to 87°F (30.6°C).
Tabling — Where It Wins
- No additional chocolate needed. The whole batch becomes its own seed; you’re not sourcing tempered solid from outside.
- You learn what temper looks like. Tabled chocolate changes viscosity and sheen visibly as crystals form — a ropy, matte, slightly grainy texture at the cool point. That visual feedback is genuinely educational; you build intuition no seeding batch ever teaches.
- Fast for small batches. For 300–800 g, an experienced worker can table in under 10 minutes.
- Spectacle value. If you’re teaching, demonstrating, or producing on camera, tabling is the method people want to watch.
Tabling — Where It Struggles
- Steep skill floor. Under-cool the chocolate on the slab and no stable crystals form — you’ll get a soft, streaky temper. Over-cool it and you’ll create Form IV or Form III crystals that melt out when you recombine, killing the temper entirely or producing a grainy finished bar.
- Ambient-temperature sensitive. A kitchen above ~22°C (72°F) or a slab that’s been sitting in the sun is a losing game. Marble slabs are typically pre-chilled to ~20°C (68°F).
- Messy. Marble, scrapers, spatulas, counter edges — there is no clean way to table chocolate.
- Poor scalability. Above ~2 kg, the slab can’t pull heat fast enough; professional shops use multi-slab relays or abandon the method for machines.
- Failure mode overlaps with bloom. A badly tabled batch that looks tempered may still set into unstable crystals that transition toward Form VI in days — classic fat bloom territory.
Seeding vs. Tabling: A Direct Comparison
When to Pick Each
Choose seeding when:
- You’re new to tempering and want the method with the fewest variables
- You’re producing bars, bonbons, or molded work in batches ≥1 kg
- Your kitchen runs warm (>22°C / 72°F)
- You have access to a known-tempered version of the chocolate you’re working with
- You need repeatable, predictable results day over day (e.g., small-batch production)
Choose tabling when:
- You have a cool kitchen (≤21°C / 70°F) and a cool slab
- You’re working with small artisan batches (300 g–1.5 kg)
- You don’t have a source of tempered seed chocolate
- You want to see the crystal state of the chocolate as a teaching or diagnostic tool
- You’re enrobing, decorating, or doing live demonstration work where speed and visual feedback matter
If you’re consistently failing at either method — unstable snap, surface streaking, dull sheen — the issue is usually temperature precision, crystal structure, or ambient conditions. The chocolate won’t temper troubleshooting guide covers the standard diagnostic flowchart. Once you have tempered chocolate in hand, the natural next step is shell molding filled bonbons or a simple bar mold.
The Third Option: When a Machine Replaces Both
Both methods exist because hand tempering was the only option for most of chocolate’s history. It no longer is. Tabletop continuous tempering machines (Revolation, ChocoVision, Mol d’Art and similar) hold a melt at working temperature indefinitely, recirculate the chocolate over a cooling element, and seed continuously as they run. They eliminate the timing risk of seeding and the skill risk of tabling.
If you temper chocolate more than a few times a month — for a cottage business, a gift production run, or sheer volume of personal projects — a machine pays for itself in saved time and reduced failed batches. The best chocolate tempering machine roundup covers current picks across price tiers.
The inflection point is roughly: under 5 kg/month, hand temper (seeding preferred). Over 15 kg/month, a machine. Between the two, it depends on how much your time is worth.
Working-Temperature Sensitivity by Chocolate Type
Every method — seeding, tabling, machine — lands on the same narrow working-temperature window, and the window differs by chocolate type because milk and sugar solids change the effective melt behavior of the cocoa butter system. These are the synthesis-sourced targets:
Milk and white chocolate have tighter tolerances because milk fats interact with the cocoa butter crystal system — you can’t push working temperatures as high without melting out too much Form V. That’s also why milk and white are typically easier to seed (less time in a wide overheat zone) and harder to table (smaller margin between under-cooled and over-cooled).
A final note on precision: the difference between Form V and Form IV is roughly 5–6°C. That’s the entire reason this process has any skill floor at all. A ±1°C thermometer is usable; a ±0.5°C digital probe is better; an IR surface thermometer is a helpful second check on tabling because it reads the slab, not the melt. Whichever method you pick, the thermometer is the non-negotiable tool.
Frequently Asked Questions
- Can I temper chocolate without a thermometer?
- You can, but only if you're tabling and have trained your eye on dozens of batches — the visible ropy-matte texture change at the cool point is a legitimate (though fallible) indicator. For seeding, a thermometer is effectively non-negotiable because there's no visual feedback before working temperature. Given that a digital probe thermometer costs under $20, there's no real reason to skip it.
- Is seeding more reliable than tabling?
- Yes — for most home and craft makers. Seeding introduces known-good Form V crystals directly, so you're extending an existing crystal structure rather than trying to spontaneously nucleate one from scratch. Tabling has more failure modes (under-cooling, over-cooling, warm ambient, warm slab) and a steeper skill floor, which is why production kitchens either seed or use continuous machines.
- Why does tabling work on marble?
- Marble has high thermal mass and high thermal conductivity — it absorbs heat quickly from the chocolate, then holds that heat without warming the surface much. Agitating chocolate across a cool marble slab forces enough cocoa butter triglycerides (POP, POS, SOS) into their β-prime orientation that stable Form V crystals nucleate. Granite works too but is slightly slower; wood and plastic don't work at all because their thermal conductivity is too low.
- What happens if I seed with the wrong kind of chocolate?
- The seed transfers more than just crystal structure — it also introduces its own cocoa butter content, emulsifiers, and any flavor characteristics. Seeding a 70% single-origin dark with mass-market couverture that contains soy lecithin and vanillin will measurably shift your final bar's flavor and viscosity. Match the seed to the melt: same chocolate type, ideally same brand or same bar.
- Can I remelt and retemper a batch that didn't set right?
- Yes, and you should — untempered or poorly tempered chocolate is not ruined, it's just in the wrong crystal state. Melt it back to 50°C (122°F) to fully reset the crystal structure, then run the temper cycle again. This is actually one of the strongest arguments for learning to temper at home: there's almost no such thing as a wasted batch, only a slower one.
- How much tempered seed do I add, and what if I don't have any?
- The standard ratio is roughly 1 part finely chopped tempered seed to 3 parts melt by weight (Dandelion's craft protocol). If you don't have tempered seed chocolate on hand, two options: buy a bar of the same chocolate from a reputable maker (assume it's well-tempered) and chop it finely, or dose ~1 percent Mycryo cocoa butter powder by weight — pre-crystallized Form V cocoa butter designed exactly for this. In a pinch, you can also table a small starter batch, set it, and use that as seed for a larger seeded batch — the first-pass table only needs to produce seed, not finished product.
- My seeded chocolate went thick and grainy. What happened?
- Over-seeding is the most common cause. You either added too much seed for the melt's thermal mass, or the melt was already too cool when the seed went in — so the cocoa butter crystallized out of the working range. The melt is now in an unworkable, over-crystallized state. Fix: re-melt to 50°C (122°F) to reset, then repeat the seed cycle with less seed and a warmer starting temperature for the cooled melt.
- Can I combine seeding and tabling in one batch?
- Yes, and many craft makers do exactly this as a hybrid safety net. Table two-thirds on the slab until visibly ropy, recombine with the warm third, then throw in a small pinch of tempered seed as final insurance against under-nucleation. This is slower than pure seeding and messier than pure tabling, but the belt-and-braces version is the most forgiving of the three approaches when you're working with an unfamiliar chocolate or a warm kitchen.