A good chocolate mold holds the shape you want, fits your batch and work area, and can be cleaned without damaging its cavity surface. For repeatable bars and molded shells, a rigid tray is convenient to fill, scrape and handle. For flexible release or intricate shapes, a silicone design may be useful.
This is a guide to choosing between designs using supplier specifications and chocolate-making guidance. It does not report a hands-on gloss, durability or release comparison.
What the Mold Does
Tempered chocolate develops a crystal structure that supports the desired texture and helps it contract during cooling. A smooth rigid mold can give that chocolate a clean surface to separate from. Callebaut’s molding method recommends polycarbonate for gloss and release.
Contraction is a property of the chocolate’s cooling and crystallization, however. A flexible mold does not switch crystallization off. Its additional advantage is that you can peel or flex the cavity away from a sufficiently set piece.
The surface of the cavity affects the surface of the finished chocolate. A textured cavity makes textured chocolate; a polished one supports a smoother finish. Snap is a separate physical observation affected by formulation, temper, bar thickness and temperature. Silicone does not inherently remove a bar’s ability to snap.
Chocolate releases heat as it crystallizes, so cooling conditions matter. There is no useful single heat-release number for every finished chocolate: the fat fraction, composition and crystallization history differ. Choose a molding and cooling method appropriate to your chocolate and bar dimensions.
Rigid Molds: Useful Features to Compare
Polycarbonate is itself a plastic. The meaningful comparison is between specific materials, construction and surface quality, not “polycarbonate versus plastic.” Other rigid materials also exist: Silikomart’s manufacturer training material identifies its Chocado chocolate range as Tritan.
Look for:
- Food-contact suitability and identifiable supplier. Choose a product intended for chocolate, with documentation and care instructions for the model you receive.
- A clean, undamaged cavity finish. Examine the areas that touch the chocolate. Scratches, residue and intentional texture can all affect appearance.
- Stable construction. A tray should remain manageable while filled and during scraping or tapping. A universal 5mm material-thickness rule does not establish durability.
- Dimensions that fit your process. Check cavity dimensions separately from the outside tray dimensions. Make sure it fits your cooling area and storage.
- A shape you can fill and release. Fine corners or deep details may be harder to fill with a thick chocolate. Shape and fluidity matter alongside material.
A Documented Rigid Bar Mold
JB Prince’s K604 six-bar mold is listed as clear rigid polycarbonate, with six cavities measuring 4.25 by 2 inches in plan and an overall 11 by 7 inch tray. The listing was backordered when checked on September 26, 2026.
It is one option to compare, not evidence that one brand is the best or that every “JB Prince bar mold” has the same dimensions. The page does not supply a verified finished chocolate weight for each cavity, so test your own fill rather than assigning it an 80g capacity.
Silicone Molds: More Than Decorative Bark
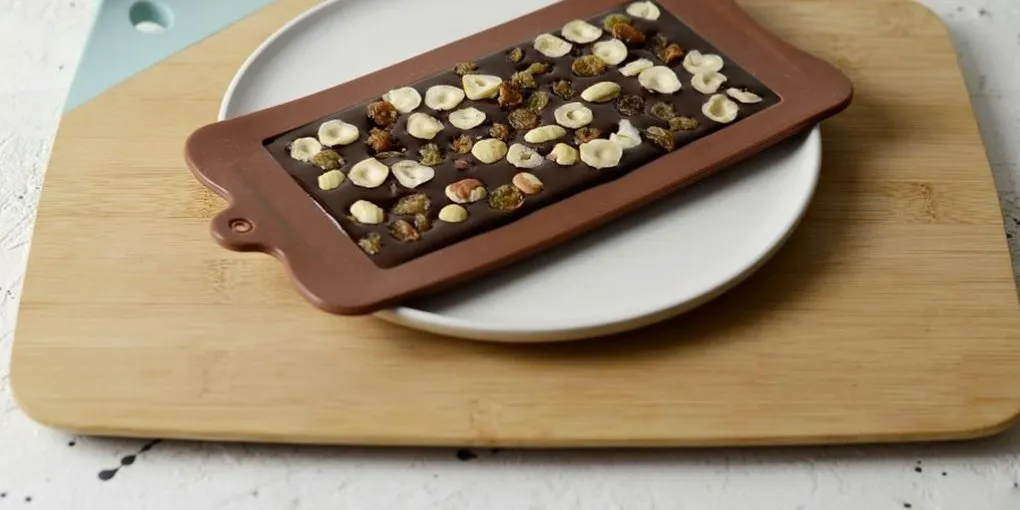
A flexible silicone mold can be used for solid chocolate bars as well as small shapes and decorative pieces. Support it on a flat tray before filling so it does not sag or spill as you move it. Let the chocolate set sufficiently before peeling the mold back.
Do not choose silicone on the assumption that tempering no longer matters. Nor should you assume every silicone cavity is matte: finish depends on the actual cavity surface and the chocolate. Refrigerator use is a cooling choice, not a unique release mechanism required by silicone.
Freshware’s CB-607BR break-apart mold is an example of a silicone design sold for chocolate. Its manufacturer recommends tray support and cooling fully before removal. The listing was sold out when checked on September 26, 2026. Use its specific care instructions rather than a generic rule for every silicone mold.
Check the Exact Model Before Buying
Use the linked supplier pages to identify the exact model, material and dimensions before ordering. Compare those specifications with the product being offered: retailer stock and product variants can differ.
Bar Size and Batch Planning
Choose a bar size for how you will eat, share or package the chocolate. There is no minimum retail-bar weight required for proper tasting. Small tablets can be useful for comparisons; larger bars may suit sharing or your preferred wrapper.
A nominal cavity weight is an estimate for a particular fill. Chocolate formulation, inclusions, shell thickness and fill height can change the actual weight. Make a sample batch and weigh the pieces before deciding how much chocolate to prepare or how to label a finished product.
For planning, multiply your measured chocolate weight per cavity by the number of cavities. For example, three cavities filled to 80g each require 240g; two such trays make six bars and hold 480g. Allow additional chocolate for the bowl, scraper and transfer losses. This is arithmetic for a chosen fill, not the specification of either product above.
A thinner bar may be easier to portion; a deeper cavity may suit inclusions or filled pieces. Neither a 5–7mm depth nor a particular total weight guarantees an audible snap or a better tasting experience.
Cleaning: Follow the Mold’s Instructions
Cleaning guidance differs by supplier and model. JB Prince’s K604 page calls for warm or hot water and mild, nonabrasive soap. It also permits dishwasher use without detergent under its stated instructions. Chocolate World publishes a different controlled washing process using compatible detergent, rinsing and specified equipment conditions.
These examples show why “never use soap” and “all polycarbonate is dishwasher-safe” are both poor universal rules. Check the instructions for your mold. If its dishwasher compatibility and detergent requirements are unclear, hand-wash gently using the maker’s recommended method.
Rinse away cleaning residues and dry completely before adding chocolate or stacking the molds. Use soft, clean, nonabrasive materials on the cavities. Polishing a cavity is not a substitute for washing when food residues or contamination need to be removed.
Inspect persistent cloudy areas after cleaning: deposits and scratches are different problems. A damaged surface may spoil the finish, but sticking alone does not prove permanent damage. Replace a cracked or otherwise unsuitable food-contact mold, and consult the supplier about surface damage.
Tempering, Filling and Cooling
Use a clean, dry mold at a temperature appropriate to the chocolate-making method. An ice-cold mold is not the default: Callebaut’s shell method warms molds before filling to reduce temperature shock. Its shell temperatures and times are specific to that procedure, not a universal schedule for every solid bar.
Temper the chocolate and test a small sample before molding. Follow the chocolate manufacturer’s working guidance rather than a universal 90°F ceiling. Callebaut’s tempering reference, for example, distinguishes dark, milk and white products.
Fill the cavities, settle trapped air using a method appropriate to the mold, and remove excess chocolate as needed. Plain solid bars do not need a spray-bottle precoat. Specialized sprayed decoration is a separate technique requiring appropriate food-use equipment and materials.
Cool until the pieces are sufficiently set for the chosen method. Twenty minutes at room temperature is not a universal release test: batch size, bar depth, chocolate and room conditions change the result. Avoid forcing pieces out with a knife or twisting a rigid mold beyond its instructions.
If a bar sticks, consider temper, cooling, cavity cleanliness and condition, chocolate fluidity and the shape being made. Callebaut’s troubleshooting guide lists multiple causes of release problems; the symptom does not diagnose one exact crystal state.
See our tempering guide and bloom prevention guide for more context.
Storage and a Sensible Starter Setup
Store clean, completely dry molds where dust, odors and cleaning sprays cannot settle inside them. Protect cavity surfaces from abrasion. Stack only in the way the design permits, so one tray does not scrape the working surface of another.
Start with enough cavity capacity for a manageable tempering session and a flat tray if your mold is flexible. You can buy more molds once you know your actual bar weight and cooling time. Extra capacity is helpful only if you can fill, move, cool and store it effectively.
Molding cannot correct grit from incomplete refining or every earlier processing fault. Diagnose the whole process instead of treating each dull patch or stuck bar as proof of poor temper. Our bean-to-bar equipment guide covers the broader setup, and cocoa butter chemistry explains the crystallization background.
Mold Design Comparison
| 01Surface | 02Handling | 03Care | 04Useful For | |
|---|---|---|---|---|
| Rigid chocolate mold | Depends on cavity finish and chocolate | Stable tray; release depends on process | Follow exact material/model instructions | Bars and molded shells |
| Flexible silicone mold | Depends on cavity finish and chocolate | Support on a tray; flex for removal | Follow exact model instructions | Bars, small shapes and flexible release |
| Lightweight formed mold | Check finish and condition | May need support; handling varies | Check reuse and temperature limits | Suitable designs for occasional batches |
A material name alone does not establish gloss, snap, service life or cleaning compatibility. Use a mold intended for food contact.
jayarrchocolate.comFrequently Asked Questions
- What type of mold is best for bean-to-bar chocolate?
- A smooth rigid mold is a useful starting choice for repeatable bars, and polycarbonate is an established option. Silicone can also work. Choose by cavity finish, dimensions, handling and the supplier's food-contact and care information; this guide does not claim a tested brand ranking.
- Why are rigid molds popular for glossy chocolate?
- A smooth cavity supports a smooth finished surface, and properly tempered chocolate can contract away during cooling. Rigidity also makes trays convenient to fill and scrape. Gloss still depends on the chocolate and process; a material name alone cannot guarantee it.
- How do I clean polycarbonate chocolate molds?
- Follow the specific mold's instructions. Some suppliers permit mild nonabrasive soap and controlled dishwasher use, while detergent and temperature limits differ. Rinse thoroughly, dry completely and protect the cavities from abrasive cleaning. Do not assume a no-soap rule applies to every mold.
- Can I use silicone molds for bean-to-bar chocolate?
- Yes. Use a mold intended for chocolate, support it on a tray and let the chocolate set before removal. Silicone does not prevent crystallization or snap. Cavity finish, chocolate formulation, temper and cooling affect the result.
- What size chocolate bar mold should I start with?
- Choose a size that fits your batch, cooling space and preferred serving or packaging. There is no compulsory 80g starting size. Weigh a trial fill: three actual 80g bars need 240g of chocolate in their cavities, while two such trays need 480g, plus handling losses.
- Why does chocolate stick in a rigid mold?
- Check temper and cooling, but also cavity cleanliness, damage, shape and chocolate fluidity. Insufficient setting time can cause sticking even when the recipe's temperatures were followed. A fixed 20-minute wait or universal temperature ceiling cannot diagnose every batch.